First-time customers often feel nervous about letting technicians dismantle their aircon units. This fear is perfectly justified, as many unqualified operators leave panels rattling and floors completely soaked.
We founded Coolbest Aircon Servicing to deliver reliable, high-quality cooling solutions to communities across Singapore at affordable prices. Knowing the exact sequence of a proper chemical wash protects your home and your investment.
Here is the comprehensive 8-step process on what to expect during an aircon chemical wash.
You will know exactly what to look for and what a finished job should look like.
Step 1: Pre-Wash Inspection (5 min)
Technicians must photograph the unit before touching any components. The inspection covers the front panel, side casing, drainage pipe, and the outdoor condenser.
Our teams use digital moisture meters and flashlights to document the exact condition of your system. You will receive these images for your records.
These initial photographs serve three critical purposes:
- Providing clear before and after proof of the cleaning quality
- Establishing accurate baseline warranty records
- Catching existing damage so the technician does not blame it on the wash
You should expect to receive these photos through WhatsApp at the final handover.
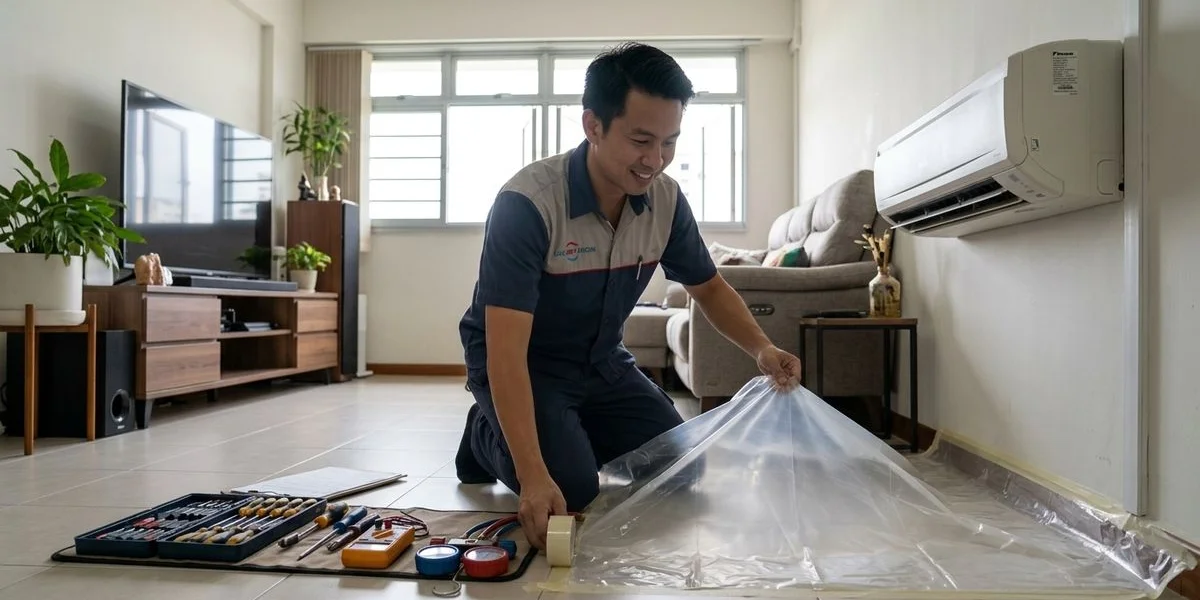
Step 2: Floor & Furniture Protection (10 min)
Proper floor protection is non-negotiable before any tools come out. Your technician should set up specific safeguards to prevent property damage.
Essential floor and furniture protection includes:
- Heavy-duty PVC plastic sheeting placed directly below the unit
- A protective dust sheet draped over nearby beds or desks
- A thick towel wrapped tightly around the drain pipe
We always secure the surrounding area to protect sensitive Singaporean flooring, like parquet or vinyl, from chemical splashes. A single drop of alkaline solution can permanently stain untreated wood.
Step 3: Unit Dismantle (20 min)
The technician will carefully remove specific components to expose the heavily soiled areas. They will systematically detach parts in a precise order.
Components are typically removed following this sequence:
- Front cover casing, using clips and sometimes retaining screws
- Nylon filter mesh
- Blower wheel, which is unclipped directly from the motor shaft
- Drainage tray
- Louvre assembly, especially if it shows heavy mould fouling
Every component is laid out on the protective floor mat for cleaning. We never carry dripping parts into your kitchen or bathroom. Doing so risks spreading contaminants through your home.
Step 4: Alkaline Chemical Soak (15 to 20 min)
The technician will apply an alkaline-based cleaning solution directly onto the evaporator coils. Professional providers use biodegradable alkaline foams with a pH of 8 to 9, like Sodium Hydroxide formulas, rather than harsh acids.
Our preferred alkaline solutions safely dissolve compacted dirt and biological growth without damaging the delicate metal parts. Acidic cleaners strip the hydrophilic coating off the aluminium coil fins and cause permanent corrosion.
During the 15 to 20 minute soak, you should monitor the air quality closely.
- Expect a faint, neutral smell as the biofilm dissolves.
- Watch for thick foaming action on the coils.
- Stop the job immediately if you detect a sharp, burning, or acidic chemical odour.
Strong acidic fumes indicate the use of cheap, damaging solutions.
Step 5: Coil Brushing & Rinse (10 min)
A soft fin brush gently works the loosened biofilm out of the narrow coil channels. The technician then rinses the entire coil system using a pressurised water jet.
This pressurised rinsing process involves strict controls:
- Using battery-operated pressure washers
- Calibrating the pressure strictly between 120 and 145 PSI
- Directing all wastewater straight into a dedicated catchment bucket
We strictly limit our water pressure to protect your system. Anything higher than 145 PSI will bend the fragile aluminium fins and ruin the unit’s cooling efficiency. Your floors stay completely dry throughout this flushing process.
Step 6: Drainage Pipe Flush (5 min)
The technician forces compressed air or water down the drain pipe from the indoor tray to the outdoor exit. This high-pressure flush clears deep blockages hidden within the line.
Our humid Singapore climate, which averages 80 to 85 percent humidity year-round, creates the perfect breeding ground for blockages. The constant condensation encourages a sticky bacterial biofilm called “aircon jelly” to form inside these pipes.
Clearing this jelly provides two major benefits:
- It ensures your system drains properly without backing up.
- It prevents the most common cause of indoor water leaks.
A surface-level wipe cannot reach these deep algae colonies. The flush pushes this jelly out completely to keep your walls safe.
Step 7: Reassembly & Vacuum-Seal Test (15 min)
The technician carefully refits all the cleaned components in exact reverse order. They must torque the drainage tray to seat perfectly against the main chassis.
Proper reassembly requires precise alignment to prevent future issues. A tray that sits off by just 1 millimetre will start dripping water within a matter of days.
We conduct a final seal test using a vacuum pump to confirm there are absolutely no leaks. This vacuum check ensures the drainage line holds proper pressure before the system turns back on.
Step 8: Function Test + Handover (10 min)
The technician powers the unit on using the cool mode and the lowest fan setting. They evaluate the system’s performance using several key metrics to ensure perfect operation.
The final functional tests include:
- Checking the suction line for frost (a slight cool temperature is normal, but solid ice indicates low R32 or R410a refrigerant).
- Measuring the discharge air temperature, which should register 10 to 12 degrees Celsius below the current ambient room temperature.
- Presenting the before and after photos to prove the internal components are clean.
You will receive a written service log that explicitly states your warranty period at the end of this test.
Total Time, What To Expect
The total duration of your service depends heavily on your specific home setup.
| Configuration | Time On-Site |
|---|---|
| 1 unit, single tech | 90 minutes |
| 3 units, single tech | 4 hours |
| 3 units, two techs | 2 hours |
| Multi-split (1 outdoor, 3 indoors) | 2.5 to 3 hours |
We recommend scheduling your appointment on a day when you have a clear block of uninterrupted time. Planning ahead ensures the job finishes properly without rushing the technician.
Noise Level
The noise level remains very low throughout the entire procedure. You will hear no heavy drilling and no loud hammering.
Our technicians rely on quiet brushwork and light water spray for the majority of the job. Most customers easily continue working from home or taking calls during the service.
What “Done” Looks Like
You must verify the quality of the work before you sign the final invoice. Inspect the unit closely using this checklist.
Before the technician leaves, confirm that:
- The front cover sits completely flush against the wall with no visible gaps.
- The directional louvres move smoothly without any stuttering or tilting.
- The unit blows cold air within 60 seconds of switching on the power.
- You see no water pooling below the indoor unit after 10 minutes of runtime.
- The drain pipe outside is dripping clear water, not milky or dirty residue.
- You hold a written receipt displaying a 90-day warranty date.
Flag any issues directly to the technician if any of these points look incorrect.
What Handover Should Include
The final handover process guarantees you have a verifiable record of the service.
Your final documentation should feature:
- Clear before and after photos sent directly via WhatsApp.
- A detailed service log listing your exact unit model and the specific chemicals used.
- A calculated reminder date for your next required service.
- A physical or digital warranty card valid for 90 days from today.
You should request the warranty written directly on the invoice if the technician forgets the official card. A simple “90-day workmanship warranty” written by hand provides sufficient legal coverage.
Ready To Book?
Book a chemical wash to secure a fixed price upfront, a written warranty, and handover photos by default.
You can reach out immediately via WhatsApp at +65 9182 5233.